MERGING RETAIL SDK - MANUALLY
Task: To merge customized Retail SDK
version 7.2.11792.64377 to 7.2.11792.65099.
In order to
merge code between the different versions of the Retail SDK first off open both
SDK folders.
open both
version files and compare changes while following the steps discussed.
Step 1:
In the “RetailSDK->Code->Assets” folder.Declare all commerce runtime (CRT) customized libraries in commerceruntime.ext.config from the previous version.
Declare all Commerce Runtime customized libraries which are required for offline support in CommerceRuntime.MPOSOffline.Ext.config
from the previous version.
Declare all Dedicated hardware station customized libraries in HardwareStation.Dedicated.config from
the previous version.
Declare the Commerce.RetailProxy customized library in dllhost.config from the previous version. And any other library in
the designated config file as required.
Step 2:
In the “RetailSDK->Code->BuildTools”
Folder in customization.config.
Provide the following details:
·
AssemblyNamePrefix.
·
CustomAssemblyVersion.
·
CustomVersion.
·
CustomName.
·
CustomDescription.
·
CustomPublisher.
·
CustomPublisherDisplayName.
·
CustomCopyright.
From the previous version file and update the version only.
Declare all CRT customized libraries where the ISV_CommerceRuntime_CustomizableFile are declared.
Declare all Hardware Station customized libraries where the ISV_HardwareStation_CustomizableFile
are declared.
Declare all Custom Database scripts where the ISV_CustomDatabaseFile_Upgrade_Custom are declared.
Declare the required libraries for proxy generation in RetailServerLibraryPathForProxyGeneration.
As required. Your Final
File should contain all changes.
Step 3:
Place all
the channel database upgrade files from previous version to newer version in “RetailSDK->Code->Database->Upgrade->Custom”.
Step 4:
In “RetailSDK->Code->Packages->RetailServer->Code”
in web.config file declare all retail server customized libraries in
the extension compositions section.
Step 5:
Paste all the required customization
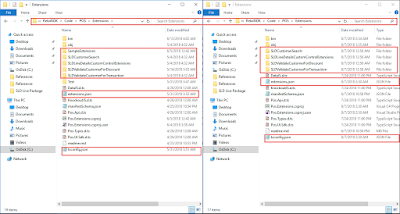
files from the previous version of RetailSDK in “RetailSDK->Code->POS->Extensions” folder. Also, delete any unnecessary extension folder except the bin and debug folder.
Open ModernPOS.sln of newer version as administrator.
Select Extension project show all
files in solution explorer include the customization folders in the project and
the files as displayed.
Also, include all the marked files as below.
Open the extension.json file and include the baseurl element as displayed.
Step 6:
Paste all
the extension libraries defined in step 1 in the “RetailSDK->Code- >References” folder from the previous Retail
version.
Step 7:
Run Visual Studios Developer Command Prompt
as administrator and change directory to the newer Retail SDK root.
And run the
following commands
· Msbuild /t:rebuild
Your
deployable package is built, it can be access for deployment in “RetailSDK->Code->Packages->RetailDeployablePackage”
folder you can also verify if the package is correctly built by looking in
the content folder. You can use the RetailDeployablePackage.zip
file for deployment.


See if your business qualifies for a free sky terminal. Manage your store and online properties with Sky’s POS and Web technologies without monthly fees, contracts, or startup costs. Cloud POS , Restaurant POS Software, Retail POS software and many more services.
ReplyDeleteRetail POS Software in UAE, Single Lisence Software in UAE, Cashiers Software in UAE
ReplyDeletehttps://gccgamers.com/retail-pos-software.html
Retail Software in UAE, Safe Shopping Multiple Payment Options Express Delivery GCC Gamers Moneyback Guarantee.
1634616701597-11